QuickTimeVR and other way to display panoramic Images
Terrace, Pool, Reception, Bar, Restaurant and magnificent views of Dunk Island and the Coral Sea. |
|
At 2228 meters above sea level Mount Kosciuszko is Australia's highest peak.
|
|
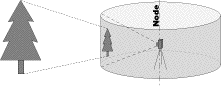
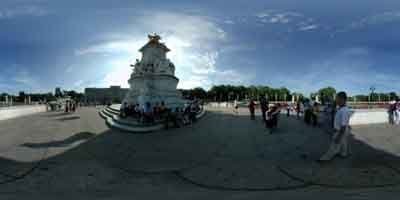
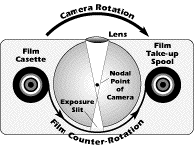
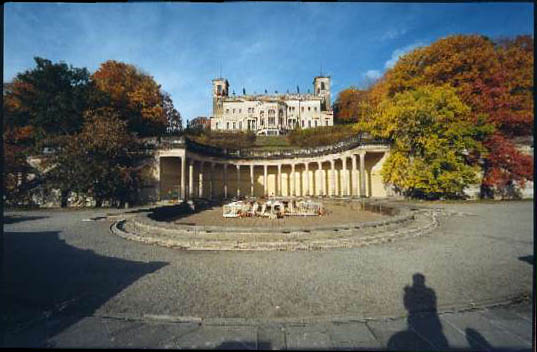
Panorama view from a single point of observation in space, The Node.The view mapped onto a cylindrical image which surrounds the point |
From the central observation point, called a node, a
viewer can look in any direction and may zoom into or out from a particular
view by changing the zoom angle of their view.
|
|
Source: http://www.letmedoit.com/qtvr/qtvr_online/Mod2/m2_covers.html
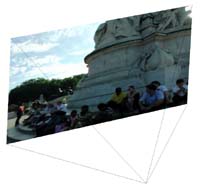
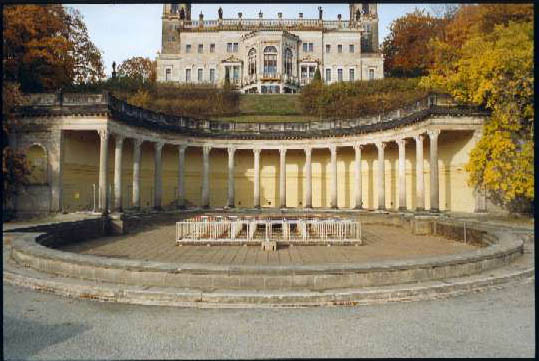
From the central observation point (the node), a viewer may zoom into or out from a particular view by changing the zoom angle of their view. The zoom angle thus represents the mapping of the cylindrical image into the viewing window on a user's monitor. As a user zooms into a panorama, the viewing window on their monitor remains the same size but shows an increasingly smaller area of the cylindrical image.
The ability to zoom into the panorama can lead to a user seeing enlarged individual pixels at very small zoom angle settings. For this reason, most developers will set a minimum and/or maximum value for the zoom angle to prevent either too wide an angle of view, or a view that becomes too pixelated.
|
|
Source: http://www.letmedoit.com/qtvr/qtvr_online/Mod2/m2_covers.html
A QTVR panorama can represent either a full or partial horizontal view from the point of observation. Full panoramas encompass a seamless cylinder which allows unrestricted horizontal movement. A certain amount of vertical movement is also possible, limited only by the height of the cylinder. Partial panoramas are a subset of a full panorama as they have only a limited horizontal range of motion.
Source : http://www.panoguide.com/howto/panoramas/whatis.jsp
Panorama is an unfortunately over-used word. As far as I am concerned a panorama is an unusually wide picture that shows at least as much width-ways as the eye is capable of seeing, if not a greater left-to-right field of view than we can ever see (e.g. it shows 'behind you' as well as 'in front'). Cinema has exploited wide images which fill more of the viewer's peripheral vision in order to enhance the immersive effect of films. Now panoramic images are being used for virtual reality too and increasingly in other simple roles such as the navigation on a website.
If you were to display the same image on a TV screen as in a Cinema screen you could describe the difference by saying that the two screens have a very different aspect ratio. What this means is that the ratio of the image width to the image height is very different. Wide screen TVs have an aspect ratio of 16:9 (approx 2:1) and cinema images are (often but not always) slightly wider at 20:9.
A 360-degree panoramic image shot with a standard 35mm lens has an aspect of approximately 57:9 but when taken with a wide-angle lens (e.g. 18mm) it becomes approx 4:1 or, to use comparable units, 57:14. Understandably it will often incorporate far more distortion and, when projected or viewed flat, can be a confusing or even unlikable image. When you use a wide angle lens you simply capture more vertically and of course the most you can capture is 180 degrees (to the verticals). Such a picture is typically referred to as a spherical panorama and has an aspect ratio of 2:1 (360 x 180 degrees). It can also be stored in cubic format, but to the end user this will have the same effect as a spherical panorama: the only difference is how the picture is stored because the viewer will project the image, distorting it back into an image that looks 'normal' to us.
 |
 |
traditional still camera : 24mmx36mm = 2:3digital movie camera : 1704x2272 : 3:4 |
16:9 aspect (widescreen TV) ... almost 2:1 |
20:9 aspect (Cinema) |
 |
57:9 aspect (360 degrees) |
 |
57:14 aspect (360 degrees, wide angle 18mm lens) |
 |
2:1 aspect (360 x 180 degrees) |
There are various types of panoramic image and various buzz-words used to describe them and the image formats used.
 |
A planar or flat panorama |
Conventional photographs may be described as "flat"
or "planar", meaning that they are intended to be viewed as is without
any perspective correction.
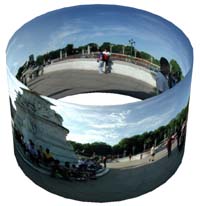 |
A cylindrical panorama |
Probably still the most common and popular format of panorama is the cylinder. A cylindrical panorama is intended to be viewed as if curved around the inside of a cylinder. If you view the image flat, you will see curves in the horizontal axis.
There are many Java applets and other viewers for displaying
panoramic images on the Internet which are designed to display cylindrical
panoramas as flat, i.e. without correcting perspective by displaying the image
as if you are looking at it inside a cylinder. These viewers display the horizontal
curves.
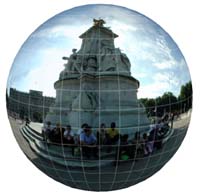 |
A spherical panorama |
Spherical images are typically represented in equirectangular format image files, which represent exactly 360 degrees on the horizontal axis and 180 degrees on the vertical. These images are intended to be viewed as if projected using a special slide projector onto the inside of a sphere. Like cylindrical images, horizontal curves can be seen in the flat image, but unlike cylindrical images, the very top and bottom of the image will seem squashed. For panoramas with a large vertical field of view, the equirectangular (spherical) image format is far more efficient than cylindrical, but if you intend to print your images out, cylindrical images look better.
In practice any panoramic image can be stored with spherical
projection in mind, meaning that it is intended to be displayed on the inside
of a sphere... but the panoramic image does not need to be 180 degrees tall
or 360 degrees wide. However if the image is less than 360 degrees wide, either
the image must be padded with empty pixels, or the actual horizontal field
of view needs to be noted down and provided to the display software so that
the image is displayed correctly. ISeeMedia's PhotoVista software is an example
of panoramic software that uses the spherical format for partial panoramic
images.
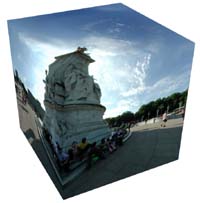 |
A cubic panorama |
Cubic images were made popular by QuickTime 5, which introduced the possibility of cubic panoramas in which the viewer can look straight up and straight down at the floor. (Of course you can do exactly that with spherical panoramas too.) Unlike cylindrical and spherical images, cubic images contain 6 separate cube faces, which are in themselves planar images, which look normal to the human eye (no horizontal curves or perspective distortion). Cubic is the most efficient format for panoramic images with a vertical field of view in excess of 140 degrees (see below), and because each of the cube faces looks "normal" these images can be easier to edit or modify with image editing software.

QTVR panoramas can be created using images captured with a variety of cameras, lenses, and films, or even from computer created environments. This flexibility, though, requires that you understand the dynamics and limitations of the capture approach you use. There are four main vehicles for creating source images for a panorama:
 |
 |
360 One VR from kaidan |
Pelle Piano's oneshot panorama |
 |
 |
 |
SpheroCam :Full spherical (360°x180°) digital images in a single rotational pass1° - 1600° cylindrical panoramas in a single rotational passHighest-quality image data in the 50-megapixel league, with 48-bit colour depth per pixel and integrated ICC colour managementBlack moutain tower partial panorama : 6 6Mpixel image, 25% overlapping ... 6 + 5x6x.75 = 28 Mpixel ...Fast operation: less than 5 minutes from setting-up and preview exposure adjustment, to final exposureImage monitoring on the notebook computer display, also in real time during the actual exposureFully-digital workflow - no film, development and scanning expenseNo “stitching” of discrete images
|
|
|
XPan |
|
BessaL |
|
Nikon
|

|
Noblex 135 |
The most common way to do this is to put your camera on a tripod, take one picture, turn the camera for a specified angle take the next picture and so on, until you are done. In practice you should have an overlap of about one third of your image (20 to 30%) width for each image pair. You do not need a digital camera, but in the long run this is cheaper.
Many lenses produce barrel- or pincushion distortion and these errors would have to be corrected before trying to join your pictures.
The next step is to put your images together, so that one single picture is created, which shows the whole panorama. This is called stitching. In practice the single images have to be warped into a common perspective, because a regular camera projects objects on a plane but a panoramic picture projects objects on a cylinder or a sphere. The parameters of the warping depend on your lens and how your camera was oriented while shooting the pictures.
Very often brightness in the overlapping areas do not match exactly so that the individual images have to be crossfaded into each other.
A common way to view panoramic images is to use special viewers e.g. QuickTimeVR or Live Picture's Zoomit. So your image has to be converted to the corresponding viewer format.
By using a tripod you can ensure that the camera rotates around a fixed spot and that it stays level. It also makes it much easier to take longer exposures, which may be useful if you want to get a nice sharp picture with everything in focus.
Check that you can lock the head of the tripod firmly and that it doesn't wobble when locked. If it does it will be difficult for you to make sure the camera stays level while you are shooting, especially if you have a large camera or if you use a panoramic head (see below), because the weight may make the tripod's head even more unstable.
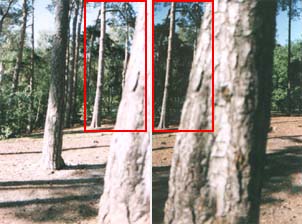
If you do not use a tripod and/or fail to keep the camera level, you may have problems stitching your pictures (depends on the software used) and you may end up having to crop your panoramas down, thereby reducing the vertical field of view:
 |
Woodland scene shot without maintaining good level |
 |
Same picture, showing how it can be cropped |
 |
Same picture after cropping (black area shows how much has been lost) |
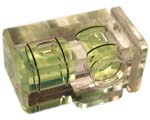 |
| Spirit level |
A spirit level is a pretty essential extra and you can buy very cheap little spirit levels designed to fit into the hot shoe of an SLR camera (see left). Use the spirit level to make sure the tripod's head is level and that when you attach the panoramic head (see below) and/or camera, that these are level also.
If you find that you are doing long exposures quite often, then a remote release cable or an infra red remote release (if there is one for your camera) can be useful. By using this you also reduce the likelihood of accidentally knocking the tripod or camera while you are doing the shoot.
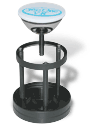
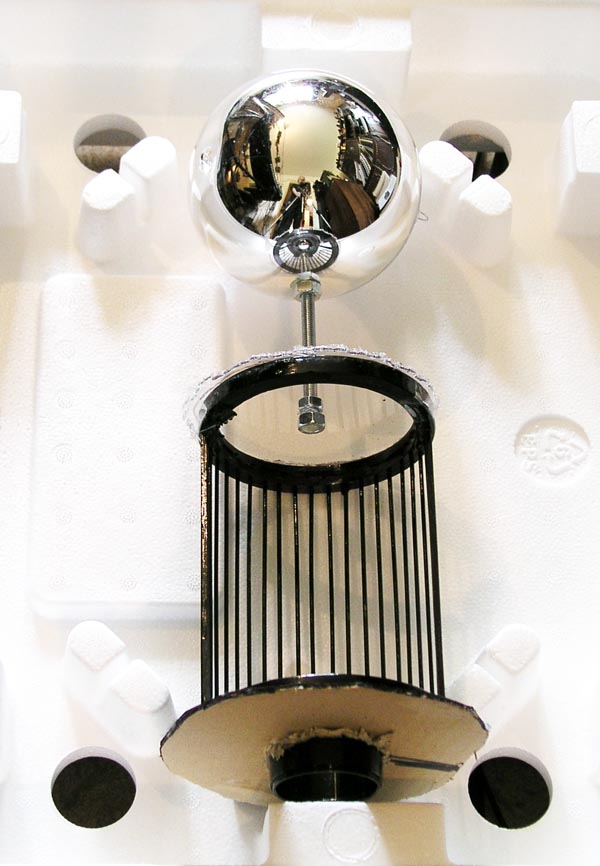
Kaidan Kiwi 900/950 panoramic head [object movie courtesy of Kaidan Inc.] |
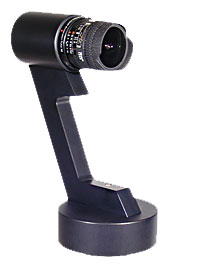
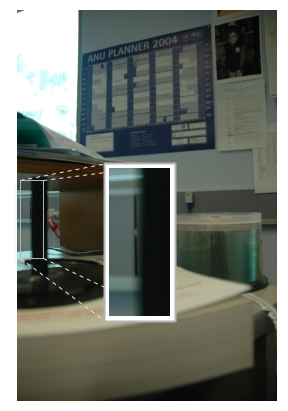
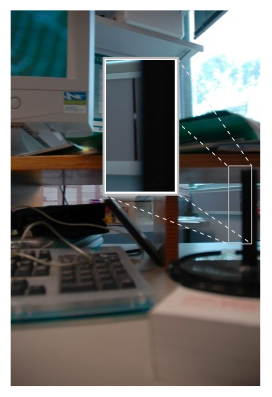
A panoramic head is an additional attachment you put on the top of the camera. It allows you to position the camera so that it rotates around one of the nodal points of the lens. This in turn eliminates parallax. If you look closely at the object movie of the Kaidan Kiwi 900/950 panoramic head, left, you will notice that the centre of the lens is above the point of rotation and that the camera is rotating about a point in the lens, not the camera body. For more information see the description of parallax and the article about using a panoramic head.
All professionals use a panoramic head, except if it is simply impossible to use one for one reason or another. The reason is that parallax can result in a poor quality picture, so if you are selling your pictures, printing them very large or just being a perfectionist, you'll want to make sure you have a panoramic head so you can get the best possible pictures to produce the best possible panoramas. A panoramic head also makes shooting the pictures much easier, more systematic, and means that you will probably spend much less time trying to stitch the pictures together afterwards.
You can buy panoramic heads from Kaidan (see www.kaidan.com), Jasper Engineering (see www.stereoscopy.com/jasper/), Manfrotto (see www.manfrotto.com) and also from Peace River Studios (see www.peaceriverstudios.com). I have an old Kaidan Kiwi plus a Kaidan QuickPan Spherical.
Panoramic heads also make it easier to rotate the camera smoothly and many have click-stops of some kind and a spirit level so you can make sure the whole set up is level before you start shooting. These features are also available in the Q-top from ideesign, which is a very neat small tripod mount that provides a quick release shoe for the camera. The shoe is held very tightly in position when placed back onto the mount, and the shoe has 30 degree increments to make it easy to shoot a series of pictures for a panorama. Whilst the Q-top is not a panoramic head, it is a very neat and small alternative especially if you are travelling light.
By shooting several pictures and stitching them together, you can create a 360 degree panoramic picture, no matter what lens you have on your camera. A wide angle lens has the advantages that (i) you don't need to take as many pictures and (ii) you can capture more vertically so the picture doesn't look like a narrow 'slit'.
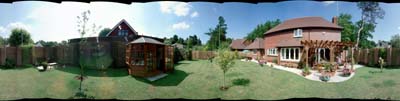 |
garden scene after stitching, 18mm lens |
 |
garden scene after stitching, equivalent to a 38mm lens |
If you are considering buying a wide angle lens for your panoramic photography, bear in mind that although all stitching programs support rectilinear ('normal') lenses, very few support fisheye lenses.
If you are new to panoramic photography I suggest you postpone any ideas of buying a special lens until you have shot a few panoramic pictures... you will then have a good idea of whether you want or need a wide angle lens and how wide a lens you need to achieve the sort of pictures you want.
An 8mm lens is generally the widest lens available for any camera, and will capture approximately 180 degrees in a circular shaped picture. The iPIX system uses this lens exclusively and requires only two pictures back to back to create a spherical panoramic image. iPIX has patents that protect its technique and prohibit the use of any other software to achieve this same effect. (However there are alternative ways of creating spherical panoramas).
Source, and For More : http://www.panoguide.com/howto/panoramas/parallax.jsp |
 |
 |
 |
Short for "Horizontal Field of View". The horizontal angle in degrees that a particular image represents of the world. The wider a lens the greater the angle of view. When using a 35mm camera the HFOV is calculable from the focal length as follows:
It pretty much goes without saying that before you can put panoramas or object movies onto the Internet, you'll need to create them first.
It is important to realise that the software you use to create your panoramas or object movies with will not necessarily create the web page for you. Also you will need a different piece of software - a "viewer" to display the panorama in the web page. This "viewer" need not be from the same company as the software you used to create your pictures and movies
The software you use for creating panoramas will have a choice of output formats (the exact choice varies from program to program ). Some of these formats are images and some are special file formats for panoramic pictures (there are also special file formats for object movies). The difference is that the special file formats include the information the viewer needs to know in order to display the picture, such as whether the panorama is a full 360 degrees, whether it is cubic, spherical or cylindrical, whether there are any hotspots that link this panorama to another one, etc.
If, for example, you decide that you want to use QuickTime in your website or on a CD, and your software doesn't allow you to create QuickTime movies, what you need to do is to save your finished work as an image and then use another program to convert from the image to a QuickTime movie.
The main thing that should influence your choice of viewer is what you want it to look like - in the case of panoramas this is affected most by what kinds of image projection the viewer supports. For both objects and panoramas you will probably want to think about the functionality you want: do you want to create hotspots to link panoramas and objects together into a virtual tour? Do you want to include music or sound effects? Do you want those sound effects to be directional? You can use the products feature search to search for viewers that have the features you want.
A lot of websites use QuickTime, so I'll start with that. To put a QuickTime movie into a web page all you need do is add HTML to the page like this:
<OBJECT CLASSID="clsid:02BF25D5-8C17-4B23-BC80-D3488ABDDC6B"
WIDTH="160"HEIGHT="144"
CODEBASE="http://www.apple.com/qtactivex/qtplugin.cab">
<PARAM name="SRC" VALUE="sample.mov">
<PARAM name="AUTOPLAY" VALUE="true">
<PARAM name="CONTROLLER" VALUE="false">
<EMBED SRC="sample.mov" WIDTH="160" HEIGHT="144" AUTOPLAY="true" CONTROLLER="false"
PLUGINSPAGE="http://www.apple.com/quicktime/download/">
</EMBED><OBJECT>
Note that CLASSID must always equal: clsid:02BF25D5-8C17-4B23-BC80-D3488ABDDC6B, CODEBASE must always equal: http://www.apple.com/qtactivex/qtplugin.cab and PLUGINSPAGE must always equal: http://www.apple.com/quicktime/download/. The other attributes should be customized to your web page. The OBJECT element can use any EMBED attributes QuickTime understands. Visit http://www.apple.com/quicktime/authoring/embed.html for more details.
If you choose to use a file format that requires a plugin to be installed on the end user's machine, you risk alienating those users that don't have the plugin. I always assume there are some users who either can't download the plugin (perhaps because of a firewall) or who don't want to (perhaps they don't know how or are worried they will mess up their computer by doing so).
A Java applet is a neat and increasingly popular alternative to a plugin viewer. A Java applet is a small computer program that you put on your website and which is downloaded by the end users' web browser when needed. So they don't have to install a plugin in advance and it all happens automatically. Both Netscape Navigator and Microsoft Internet Explorer are capable of supporting Java applets. So, all you have to do is upload your chosen Java applet to your website, put the Java applet into your webpage, and then if someone wants to view your work the Java program is automatically downloaded to their machine. No plugin, no complicated installation, nothing. Not everyone has Java installed though. If you do a standard Microsoft Interner Explorer installation the Java VM will not be installed. It's only installed later if you load a web page with Java in...
There is one more problem with using Java. Some browsers (notably Netscape) have memory limits which prevent large images being used. This is why it is recommended that you keep your panoramic images below 500,000 pixels in size when using their java viewer. If you exceed this you will see an error message 'Out of memory' on some web browsers. Helmut Dersch's PT Viewer for Java can avoid this problem by cleverly splitting the image into sections, by-passing the limitation in the Java VM.
Advantage |
Disadvantage |
|
Plugin |
Faster |
Some people won't have the plugin |
Java |
Normally no user-intervention required |
Slower |

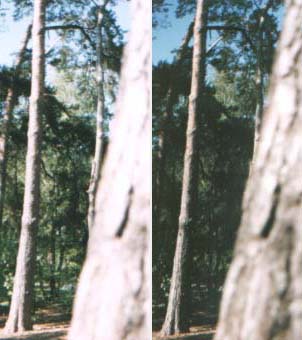
 Small
zoom angle
Small
zoom angle