eScience Lectures Notes : Introduction to Java and Java2D
Slide 1 : 1 / 29 : Introduction to Java 2D
Java Revisal
I will try to go trough quite quickly on that first part
as it should be a revisal for most of view. If something is not clear, it is
time to ask question now...
Slide 2 : 2 / 29 : Object-Oriented Programming
Object-Oriented Programming
A bit of ad : OOP ask a effort in the beginnings ...
Java supports the Object-Oriented Programming (OOP) approach.
OOP focuses on the design of data-types (called objects or classes) rather
than algorithms
Why is this distinction important?
Objects are nouns, Algorithms are verbs
If you want to put a windows in a wall, you don't say
:
"Let's use a hammer to make a hole in that wall,
then let's measure the size of the hole, then lets buy some piece of wood that
we will put together, then ...
You say : Let's decide to have a windows in that wall
You know first what you want and then you think of the
way you will get it
Which is an easier task?
-
identify the actions that apply to a given noun
-
identify those objects to which a given action might be applied
- Example : Verb "to buy" / Object "Car"
isn't it easier to list the actions that you can do with
a car (to buy, to sell, ...to drive°) than to list all the object you can
buy ... and forget lots of them ?
What is easier?
-
identifying similar object classes
is a relationship
-
specifying general-purpose algorithms
with lots of "if then else" statements
Advantages of OOP
-
promotes design abstraction (hiding details)
-
promotes code reuse
-
consolidates specification and interface ... encapsulation
Slide 3 : 3 / 29 : CG Example
CG Example
Object-Oriented Design
|
Procedural Design
|
-
Similar object classes
-
Common interfaces
-
Common usage
-
Code reuse-- inheritance
-
Defers implementation and algorithm decisions
From general architecture towards details
|
-
Algorithm centred -
forces early implementation
and algorithm decisions
-
Exposes more details
-
Difficult to extend
-
Difficult to maintain
From details towards construction of complex buildings
|
 |
 |
Slide 4 : 4 / 29 : Polymorphism
Polymorphism
Polymorphism allows algorithms to be specified in terms of the most general
(and/or reasonable) object type
 |
void processShape(Shape s)
	{
	s.setColor(Color.red);
 	// ... do stuff
	s.draw();
	}

Circle c = new Circle(x, y, r);

Point2D v1 = new Point2D(x1, y1);
Point2D v2 = new Point2D(x2, y2);
Point2D v3 = new Point2D(x3, y3);
Triangle t = new Triangle(v1, v2, v3);

Point2D c1 = new Point2D(u1, v1);
Point2D c2 = new Point2D(u2, v2);
Triangle r = new Rectangle(c1, c2);

processShape(c);
processShape(t);
processShape(r);
|
Slide 5 : 5 / 29 : Java Specifics : space and curly braces
Java Specifics : space and curly braces
A Java source program is composed of white space, comments, declarations,
and statements.
{
	White space is a very important part of any Java program
	{
		has no effect on the code's meaning
		enhances readability and communicates structure

		includes : spaces, tabs, and new lines.
		typically, tabs or indention set off blocks of code
		new-lines separate statements
	}
}
There are lots of different"rules and conventions" on using white
space and curly braces.
Adopt a consistent style !
Make sure that readers could easily find beginning and
end of your blocks
A Java source program is composed of white space, comments,
declarations, and statements.
White space is a very important part of any Java program. While it has no effect
on the meaning of the code, white space, more than any other factor, contributes
to the readability and signals the structure of a code fragment. White space
includes, spaces, tabs, and new lines. Typically, tabs or indention is used
to set off blocks of code, and new lines are used to separate statements. There
are no hard-fast rules how and when to use white space, all I suggest is that
you adopt a consistent style.
Slide 6 : 6 / 29 : Comments
Comments
Next to white space, the most important parts of any Java program are its
comments.
Inline comments:
answer = 42; // valid independent of the input
Block comments:
/*
... This next bit of code is so obvious that I hesitated
  to comment it a first.
  For those whom intergalactic culture is limited,
  please refer to the textbook :
  "the hitch hicker guide for the galaxy" by Douglas Adams.

  tip : 42 is the answer for life, the universe and everything
*/
	answer = 42;
Next to white space, the most important part of any Java
program is comments. Keep in mind the syntax of a language is designed for communicating
a program's design to a computer. Comments, on the other hand, are the primary
mechanism for communicating a program's design to humans. Java has three types
of comments.
Slide 7 : 7 / 29 : Special Comments
Special Comments
Java provides a special form of comment for generating automatic documentation,
and web pages. It uses a tool called javadoc. Within these special comment blocks
several special variables, indicated by a leading @, are recognized.
Documentation comments:
/** The Universe and Everything
 *
 *	@version 0.9999 Date : This must be Thursday
 *	@author Ford Prefect
 *	@author Arthur Dent
 *  @see <A HREF="http://users.milliways.mg-net.de/BSAFH/guide/">the book</A>
 */

public class theUnivers
{
	public static String getTheAnswer()
	{
		return("42");
	}

	/**
	 *  @deprecated Remember a important thing about that question ...
	 * "It is said that if both the question and the answer to Life,
	 * the Universe and Everything ever exist in the same dimention
	 * it will dissappear and be replaced by something even more strange
	 * and unexplicable" -Hitch Hicker Guide To The Galaxy
	 */
	private String getTheQuestion()
	{
	while(true)
		{
		sleep(1);
		}
	}
}
Slide 8 : 8 / 29 : Java Data Types
Java Data Types
Variables in Java must be objects, arrays, or one of the primitive data types
Java has 8 primitive data types
(boolean, byte, short, int, long, double, float, char)
Notes:
-
All integer types are signed (and there is no unsigned keyword)
-
Unlike C and C++ char variables are 16 rather than 8 bits
Because Java is Unicode compliant
-
Unlike C, Java types have a definitely fixed size
in C, it used to depend on the compiler
-
Primitive data types are passed to method by value
the actual value of a primitive type can only
be modified by the methods of the declaring or derived object
boolean likeeScience = true;
	/*	boolean likewise have values {true, false}
		they can never be mixed up with integer or other type
	 */
byte teeth = 32;		// bytes go from -128 to 127
if (!likeeScience) teeth = teeth - 1;
float pi = 3.141592f; 	// you need the "f" here
short classes = 0xbad;	// hexadecimal
Slide 9 : 9 / 29 : Java Arrays
Java Arrays
Java arrays fall between a primitive data type and an object
Properties of Java arrays:
-
can contain objects, primitive types, or other arrays
-
contents are accessed via zero-based positive integers enclosed within
the brackets, [, and ]
-
declaration, creation and, value initialisation of arrays are distinct
operations
-
created with the new operator
-
uninitialised arrays have a value of null
-
have a single instance variable called 'length'
-
checks at run time, that all accesses are between 0 and length - 1
-
passed to methods by reference
byte buffer[];		// array declaration (buffer = null)
buffer = new byte[1024];	// array creation (contents initialised to zeros)
int table[] = new int[10];	// declaration and creation combined

int sqrs[] = {0, 1, 4, 9, 16, 25, 36, 49, 64, 81 }; // with an initializer
buffer[5] = sqrs[sqrs.length-1]; // array references

int triangle[][] = new int[3][];	// 2D Arrays do not have to be matrix
triangle[0] = new int[3];
triangle[1] = new int[2];
triangle[2] = new int[1];
Slide 10 : 10 / 29 : Java Objects
Java Objects
Objects are containers around aggregates of primitive types, arrays, and other
objects
-
Properties of Classes
-
All Java code is contained within objects
Excepted comments, import and package statements.
-
Objects are passed to methods by reference
-
Definition, declaration, and creation of objects are distinct
-
Instances of objects are created with new and have a value of null
-
Objects have four forms: the class, the abstract class, the inner class,
and the interface
class Circle						// object definition
{	static double pi = 3.141592;	// class variable
	double radius;					// instance variable
	public Circle(double r)			// constructor method
	{	radius = r;
	}
	public double circumference()	{	return 2*pi*radius; }
	public double area()	{	return pi*radius*radius; }
	public static getPi()	{	return pi;	}	// class method
}

Circle c;				// object declaration
c = new Circle(4.0);	// object creation
double a = c.area();	// object method call
Slide 11 : 11 / 29 : Java Statements
Java Statements
Statements are all that remains!
-
Individual statements are terminated by semicolons
-
Blocks of statements are grouped using braces, {, and }
-
Simplest statement is the expression.
An expression is a string of variables and constants separated by operators.
Java allows the following set of operators within statements:
. [] ()
++ -- ! ~ instanceof
* / %
+ -
<< >> >>>
< > <= >=
== !=
&
^
|
&&
||
?:
= *= /= %= += -= <<= >>= >>>= &= ^= |=
The final component of a Java program is its statements.
Individual statements are terminated by semicolons. Groups of statements and
declarations enclosed within braces, { and }, are called block statements and
they act like an individual statement. Block statements do not require a terminating
semicolon. The simplest type of statement is the expression.
An expression is a string of variables and constants separated
by operators. A common type of expression is the assignment where a variable
is given the value of the expression to the left of an equal sign. If one of
the operator-assignment forms is used, the variable is given the value of expression
to the left of the equals sign combined with it previous value of the variable
as determined by the operator to the left of the equals sign. For more specific
details on operators and the types of arguments that they allow see the textbooks.
Slide 12 : 12 / 29 : Control Statements
Control Statements
The second type of statement is the control statement.
The following list illustrates some of the control statements available in
Java:
Really classical structure, especially easy to understand
for english speaking programmer.
NB : BoolleanExpression are Boolean Expressions)
Break, continue, Label ...
Loop : be sure to get out of it
if (BooleanExpression) Statement

if (BooleanExpression) Statement else Statement

while (BooleanExpression) Statement

do Statement while (BooleanExpression)

for (Expression; BooleanExpression; Expression) Statement

break <Label>

continue <Label>

Label: Statement

switch (IntegerExpression)
{
	case IntegerValue:
		Statements
	default:
		Statements
}

return Expression
In these examples reserved keywords are shown in bold.
Slide 13 : 13 / 29 : Others Java Subjects
Others Java Subjects
-
Constructors and the "new" operator
new create a new object from a class. It allocates memory
and call the adequate constructor method of the class to initialise field values.
-
Class variables and method distinctions
(this, super, abstract, final, static, instance, and class variables)
Let the students talk ...
This : the object instance of a class (constructors)
super : the parent class
final : method can't be overwritten, class can not be subclassed
static : a class thing. No object instance is needed.
-
Packages (package and import)
This week exercise
-
Class protection (public, private, protected)
public : accessible anywhere
private : member accessible only within the class that defines it
protected : member accessible only within package and within subclasses.
A way to deal with things that should not happen (better
than the if then else)
Each time there is an input from outside of the program
-
Interfaces and abstract classes
abstract : a method implementation is missing somewhere
We now know enough to write a simple example.
Slide 14 : 14 / 29 : What you will need...
What you will need...
A text Editor
Mac
BBEdit, ProjectBuilder, TextEdit, jedit ...
Unix
vi, emacs, Xemacs
Windows
TextEdit, Xemacs, TexPad
Java Documentation API :
Java Compiler : javac
Java Virtual machine : java
Java comments extractor : javadoc
Java archive tool : jar
and sometime an aplet viewer
and an account in the lab ?
Slide 15 : 15 / 29 : A First Example
A First Example
/** Simple Java 2D Example
 *
 *	@version 0.9  12/07/2001
 *	@author Pascal Vuylsteker
 */


import javax.swing.*;


public class HelloWordSimple
{	public static void main(String[] args)
	{	HelloWordFrame frame = new HelloWordFrame();
		frame.setDefaultCloseOperation(JFrame.EXIT_ON_CLOSE);
		frame.show();
	}
}


class HelloWordFrame extends JFrame
{	public HelloWordFrame()
	{	setTitle("Hello World !! ");
		setSize(300,200);

		HelloPanel panel = new HelloPanel();
		Container contentPane = getContentPane();
		contentPane.add(panel);
	}
}

class HelloPanel extends JPanel
{	public void paintComponent(Graphics g)
	{	super.paintComponent(g);
		g.drawString("Hello again...", 20, 20);
	}
}
Slide 16 : 16 / 29 : A First Example with comments
A First Example with comments
All Java source code files should end with a .java extension.
When a Java program is compiled one or more .class files are generated. The
number of .class files generated by a compile depends on how many objects are
defined in the source file.
Let's test it first
/** Simple Java 2D Example
 *
 *	@version 0.9  12/07/2001
 *	@author Pascal Vuylsteker
 */


// to tell to the compiler where to look for class definition
// class that are not in the default package nor in java.lang
import javax.swing.*;

// that was missing...
import java.awt.*;


//Since all Java code must be contained within an object,
// an object called HelloWordSimple is defined in this file.

// "There should be only one"... public class per file

public class HelloWordSimple
{
//	in order to run a program, the public class should contain
//  a main method which is static
	public static void main(String[] args)
	{	HelloWordFrame frame = new HelloWordFrame();
		frame.setDefaultCloseOperation(JFrame.EXIT_ON_CLOSE);
		frame.show();
	}
}

// You don't even need to know any of the details of how a class works,
//  beyond the interfaces to methods, in order to modify the original code. This
//  is a simple example of the power of object-oriented programming.
class HelloWordFrame extends JFrame
{	public HelloWordFrame()
	{	setTitle("Hello World !! ");
		setSize(300,200);

		HelloPanel panel = new HelloPanel();
		Container contentPane = getContentPane();
		contentPane.add(panel);
	}
}

// JPanel has to be extented : the main method contain all
// the work.
class HelloPanel extends JPanel
{	public void paintComponent(Graphics g)
	{	super.paintComponent(g);
		g.drawString("Hello again...", 20, 20);
	}
}
NB : what is wrong with HelloWordSimple2.java
?
It is not object oriented programming...
See the last semester summary about graphics
Slide 17 : 17 / 29 : JFrame
JFrame
JFrame class is a Swing extension of the AWT Frame class
(Swing adds a J).
It is one of the few ``non-painted'' graphics components.
Frames are examples of containers and we will
study ways of inserting graphics objects into them.
Swing lives in javax.swing.*.
The 'x' stands for 'extension'.
setSize
By default JFrame has 0x0 pixels! You need to
define your own frame class which extends it and which is bigger. Use the
setSize() method to increase its size.
Units of size are pixels.
setDefaultCloseOperation(JFrame.EXIT_ON_CLOSE);
defines what happens when you close the frame
In other programs you would want to change this so that
the program did not exit whenever the user closed a window. By default a frame
is ``hidden'' when a user closes it but the program does not terminate.
show
Frames start their life invisible! You must call show
to display them.
Note that the main program exits after the show call.
This just terminates the main thread.
Graphics is in a separate thread.
What else to do ?
Many of the useful JFrame methods are inherited
from other classes further up the hierarchy
javax.swing
Class JFrame
java.lang.Object
  |
  +--java.awt.Component
        |
        +--java.awt.Container
              |
              +--java.awt.Window
                    |
                    +--java.awt.Frame
                          |
                          +--javax.swing.JFrame
Frame class
- dispose
which closes the window down and reclaims any system
resources.
- setIconImage
which lets you read in your own image for a window
icon.
- setTitle
- setResizable
which takes a boolean argument to specify whether
or not the user is able to resize the window.
Component and Window classes
(particularly methods to resize and position the
frame):
This method can move the frame around. Note that y measures
the number of pixels down from the top left corner of the screen. Also note
that both arguments are integers.
- setBounds(x, y, width, height)
This allows you to define the position and size in one command.
Note that the coordinates in JFrame methods
are with respect to the whole screen. In other swing classes they are usually
with respect to a specific container.
How to get Screen Dimension ?
It is possible to get the dimensions of the screen you
are using by creating an object of class Toolkit and calling its
getScreenSize() method. This returns the width and height as fields in
a dimension object. The pattern is
        Toolkit kit = Toolkit.getDefaultToolkit();
        Dimension screenSize = kit.getScreenSize();

        int screenHeight = screenSize.height;
        int screenWidth = screenSize.width;
Slide 18 : 18 / 29 : JPanel
JPanel
Why not on JFrame ?
Added to the JFrame content Pane
 |
The glass pane
Hidden, by default. If you make the glass pane visible,
then it's like a sheet of glass over all the other parts of the root pane.
It's completely transparent unless you implement the glass pane's paint
method so that it does something, and it intercepts input events for the
root pane.
The layered pane
Serves to position its contents, which consist of
the content pane and the optional menu bar. Can also hold other components
in a specified Z order.
The content pane
The container of the root pane's visible components,
excluding the menu bar. For information on using the content pane, see
Using Top-Level Containers.
The optional menu bar
The home for the root pane's container's menus.
If the container has a menu bar, you generally use the container's setJMenuBar
method to put the menu bar in the appropriate place. For more information
on using menus and menu bars, see How to Use Menus.
|
Although it is possible to draw directly onto a JFrame
this is considered to be bad programming practice. The thing most swing programmers
do is to add components to the content pane which is part of the JFrame.
(See fig 7-7.) The thing to do is to call the getContentPane() method
of your JFrame to create a Container object and then to add
Componentto this.
        Container contentPane = getContentPane();
        HelloPanel panel = new HelloPanel();
        contentPane.add(panel);
A panel that extend JPanel :
-
surfaces onto which you can draw
-
containers into which you can insert other interface components (sliders,
radio buttons ...)
Why do you extend JPanel? Because the basic
panel is very boring. You need to override its paintComponent method
so that the system will draw interesting objects.
A paintComponent method to override
Slide 19 : 19 / 29 : Java2D Overview
Java2D Overview
-
Draw lines of any thickness
-
Fill shapes with gradients and textures
-
Move, rotate, scale, and shear text and graphics
-
Composite overlapping text and graphics
For example, you could use the Java 2D API to display
complex charts and graphs that use various line and fill styles to distinguish
sets of data, like those shown in the following figure.
-
storage and manipulation of image data
The Java 2D API also enables you to store and to manipulate
image data--for example, you can easily perform image-filter operations, such
as blur and sharpen, as shown in the following figure.
Slide 20 : 20 / 29 : Overview of the Java 2D API
The Java 2D API introduced in JDK 1.2 provides enhanced
two-dimensional graphics, text, and imaging capabilities for Java programs through
extensions to the Abstract Windowing Toolkit (AWT). This comprehensive rendering
package supports line art, text, and images in a flexible, full-featured framework
for developing richer user interfaces, sophisticated drawing programs and image
editors.
The Java 2D API provides
-
A uniform rendering model for display devices and printers
-
A wide range of geometric primitives, such as curves, rectangles, and
ellipses and a mechanism for rendering virtually any geometric shape
-
Mechanisms for performing hit detection on shapes, text, and images
-
A compositing model that provides control over how overlapping objects
are rendered
-
Enhanced color support that facilitates color management
-
Support for printing complex documents
These topics are discussed in the following sections:
Slide 21 : 21 / 29 : Java 2D Rendering
Java 2D Rendering
The basic rendering mechanism is the same as in previous
versions of the JDK--the drawing system controls when and how programs can draw.
When a component needs to be displayed, its paint or update
method is automatically invoked with an appropriate Graphics context.
The Java 2D API introduces java.awt.Graphics2D,
a new type of Graphics object. Graphics2D extends
the Graphics
class to provide access to the enhanced graphics and rendering features of the
Java 2D API.
To use Java 2D API features, you cast the Graphics object passed
into a component's rendering method to a Graphics2D
object.
public void Paint (Graphics g) {
    Graphics2D g2 = (Graphics2D) g;
    ...
}
Slide 22 : 22 / 29 : Java 2D Rendering Context
Graphics2D Rendering Context
The collection of state attributes associated with a
Graphics2D object is referred to as the Graphics2D rendering context.
To display text, shapes, or images, you set up the Graphics2D rendering context and then call one of the Graphics2D
rendering methods, such as draw or fill. As the following
figure shows, the Graphics2D rendering context contains several
attributes.
To set an attribute in the Graphics2D rendering context, you
use the set Attribute methods
 |
The pen style : setStroke
that is applied to the outline of a shape. This
stroke attribute enables you to draw lines
with any point size and dashing pattern and to apply end-cap and join
decorations to a line.
|
 |
The fill style : setPaint
that is applied to a shape's interior. This paint
attribute enables you to fill shapes with solid colors, gradients, and
patterns.
|
 |
The compositing style : setComposite
that is used when rendered objects overlap existing
objects.
|
 |
The transform : setTransform
that is applied during rendering to convert the
rendered object from user space to device-space coordinates. Optional
translation, rotation, scaling, or shearing transforms can also be applied
through this attribute.
|
|
|
The clip : setClip
which restricts rendering to the area within the
outline of the Shape used to define the clipping path.
Any Shape can be used to define the clip.
|
 |
The font :
setFont
used to convert text strings to glyphs.
|
 |
Rendering hints : setRenderingHints
that specify preferences in the trade-offs between
speed and quality. For example, you can specify whether antialiasing
should be used, if it's available.
|
Slide 23 : 23 / 29 : Rendering Methods
Rendering Methods
Example
When you set an attribute, you pass in the appropriate
attribute object. For example, to change the paint attribute to a blue-green
gradient fill, you would construct a GradientPaint object and then
call setPaint.
gp = new GradientPaint(0f,0f,blue,0f,30f,green);
g2.setPaint(gp);
Graphics2D holds references
to its attribute objects--they are not cloned. If you alter an attribute object
that is part of the Graphics2D context, you need to call the appropriate
set method to notify the context. Modifying an attribute object
during rendering causes unpredictable behavior.
Graphics2D Rendering Methods
Graphics2D provides the following general
rendering methods that can be used to draw any geometry primitive, text, or
image:
draw
--renders the outline of any geometry primitive,
using the stroke and paint attributes. fill
--renders any geometry primitive by filling
its interior with the color or pattern specified by the paint attribute.
drawString
--renders any text string. The font attribute
is used to convert the string to glyphs, which are then filled with the color
or pattern specified by the paint attribute. drawImage
--renders the specified image.
In addition, Graphics2D supports the Graphics rendering
methods for particular shapes, such as drawOval and fillRect.
Slide 24 : 24 / 29 : Coordinate Systems
Coordinate Systems
The Java 2D system maintains two coordinate spaces.
-
User space
is the space in which graphics primitives are
specified.
-
Device space
is the coordinate system of an output device,
such as a screen, window, or a printer.
User space is a device-independent logical coordinate
system : the coordinate space that your program uses.
All geometries passed into Java 2D rendering routines are specified in user-space
coordinates.
Default transformation
When the default transformation from user space to device
space is used, the origin of user space is the upper-left corner of the component's
drawing area. The x coordinate increases to the right, and the y coordinate
increases downward, as shown in the following figure.
Device space is a device-dependent coordinate system that
varies according to the target rendering device. Although the coordinate system
for a window or the screen might be very different from that of a printer, these
differences are invisible to Java programs. The necessary conversions between
user space and device space are performed automatically during rendering.
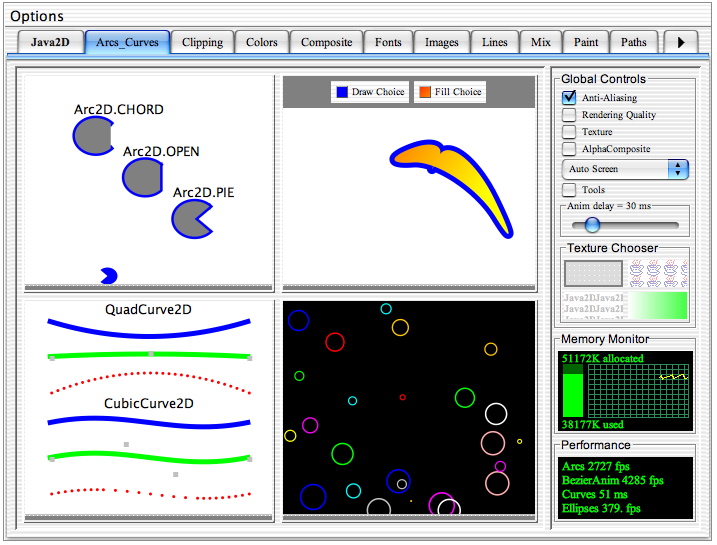
Slide 25 : 25 / 29 : Shapes
Shapes
The classes in the java.awt.geom package define common
graphics primitives, such as points, lines, curves, arcs, rectangles, and ellipses.
Classes in the java.awt.geom Package
| Arc2D |
Ellipse2D |
QuadCurve2D |
| Area |
GeneralPath |
Rectangle2D |
| CubicCurve2D |
Line2D |
RectangularShape |
| Dimension2D |
Point2D |
RoundRectangle2D |
Each geometry classes implements the Shape interface
Except for Point2D and Dimension2D,
each of the geometry classes (geometries) implements
the Shape interface, which provides a common set of methods for
describing and inspecting two-dimensional geometric objects.
draw or fill method
With these classes you can create virtually any geometric
shape and render it through Graphics2D by calling the draw
method or the fill method.
For example, the geometric shapes in the following ShapesDemo2D
applet are defined by using basic Java 2D geometries.
Example : ShapesDemo2D.java.
Rectangular Shapes
The Rectangle2D, RoundRectangle2D,
Arc2D, and Ellipse2D primitives are all derived from
RectangularShape, which defines methods for Shape
objects that can be described by a rectangular bounding box. The geometry of
a RectangularShape can be extrapolated from a rectangle that completely
encloses the outline of the Shape.

QuadCurve2D and CubicCurve2D
The QuadCurve2D class allows you to create
quadratic parametric curve segments. A quadratic curve is defined by two endpoints
and one control point.
The CubicCurve2D class allows you to create
cubic parametric curve segments. A cubic curve is defined by two endpoints and
two control points. The following figures demonstrate examples of quadratic
and cubic curves.
See Stroking and
Filling Graphics Primitives to see implementations of cubic and quadratic
curves.
GeneralPath
The GeneralPath class enables you to construct
an arbitrary shape by specifying a series of positions along the shape's boundary.
These positions can be connected by line segments, quadratic curves, or cubic
(Bézier) curves. The shape pictured below can be created with three line
segments and a cubic curve.
See Stroking
and Filling Graphics Primitives to see the implementation of this shape.
Areas
With the Area class you can perform boolean
operations, such as union, intersection, and subtraction, on any two Shape
objects. This technique, often referred to as constructive area geometry, enables
you to quickly create complex Shape objects without having to describe
each line segment or curve.
How to draw and fill shapes is described in the next
lesson, Displaying Graphics with Graphics2D.
Now, let's have a Second look at an example.
Example : ShapesDemo2D.java.
Slide 26 : 26 / 29 : Stroking and Filling Graphics Primitives
Stroking and Filling Graphics Primitives
By changing the stroke and paint attributes in the Graphics2D
context before rendering, you can easily apply fancy line styles and fill patterns
to graphics primitives. For example, you can draw a dashed line by creating
an appropriate Stroke object and calling setStroke
to add it to the Graphics2D context before you render the line.
Similarly, you can apply a gradient fill to a Shape by creating
a GradientPaint object and adding it to the Graphics2D
context by calling setPaint before you render the Shape.
The following applet demonstrates how you can render
basic geometries by using the Graphics2D draw and
fill methods.
ShapesDemo2D.java
contains the complete code for this applet.
Each of the shapes drawn by the applet is constructed
from one of the geometries and is then rendered through Graphics2D.
The rectHeight and rectWidth variables in this example
define the dimensions of the space where each shape is drawn, in pixels. The
x and y variables change
for each shape so that they are drawn in a grid formation.
 |
// draw Line2D.Double
g2.draw(new Line2D.Double(x, y+rectHeight-1,
                          x + rectWidth, y));
|
 |
// draw Rectangle2D.Double
g2.setStroke(stroke);
g2.draw(new Rectangle2D.Double(x, y,
                               rectWidth,
                               rectHeight));
|
 |
// draw RoundRectangle2D.Double
g2.setStroke(dashed);
g2.draw(new RoundRectangle2D.Double(x, y,
                                   rectWidth,
                                   rectHeight,
                                   10, 10));
|
 |
// draw Arc2D.Double
g2.setStroke(wideStroke);
g2.draw(new Arc2D.Double(x, y,
                         rectWidth,
                         rectHeight,
                         90, 135,
                         Arc2D.OPEN));
|
 |
// draw Ellipse2D.Double
g2.setStroke(stroke);
g2.draw(new Ellipse2D.Double(x, y,
                             rectWidth,
                             rectHeight));
|
 |
// draw GeneralPath (polygon)
int x1Points[] = {x, x+rectWidth,
                  x, x+rectWidth};
int y1Points[] = {y, y+rectHeight,
                  y+rectHeight, y};
GeneralPath polygon = new
	 GeneralPath(GeneralPath.WIND_EVEN_ODD,
		     x1Points.length);
polygon.moveTo(x1Points[0], y1Points[0]);

for (int index = 1;
     index < x1Points.length;
     index++) {
        polygon.lineTo(x1Points[index],
                       y1Points[index]);
};

polygon.closePath();
g2.draw(polygon);
|
 |
// draw GeneralPath (polyline)
int x2Points[] = {x, x+rectWidth, x,
                  x+rectWidth};
int y2Points[] = {y, y+rectHeight,
                  y+rectHeight, y};
GeneralPath polyline = new
         GeneralPath(GeneralPath.WIND_EVEN_ODD,
           	     x2Points.length);

polyline.moveTo (x2Points[0], y2Points[0]);

for (int index = 1;
     index < x2Points.length;
     index++) {
 	 polyline.lineTo(x2Points[index],
         y2Points[index]);
};

g2.draw(polyline);
|
 |
// fill Rectangle2D.Double (red)
g2.setPaint(red);
g2.fill(new Rectangle2D.Double(x, y,
        rectWidth, rectHeight));
|
 |
// fill RoundRectangle2D.Double
g2.setPaint(redtowhite);
g2.fill(new RoundRectangle2D.Double(x, y,
                                   rectWidth,
                                   rectHeight,
                                   10, 10));
|
 |
// fill Arc2D
g2.setPaint(red);
g2.fill(new Arc2D.Double(x, y, rectWidth,
                         rectHeight, 90,
                         135, Arc2D.OPEN));
|
 |
// fill Ellipse2D.Double
g2.setPaint(redtowhite);
g2.fill (new Ellipse2D.Double(x, y,
                              rectWidth,
                              rectHeight));
|
 |
// fill and stroke GeneralPath
int x3Points[] = {x, x+rectWidth, x,
                  x+rectWidth};
int y3Points[] = {y, y+rectHeight,
                  y+rectHeight, y};

GeneralPath filledPolygon = new
         GeneralPath(GeneralPath.WIND_EVEN_ODD,
		     x3Points.length);
filledPolygon.moveTo(x3Points[0],
                     y3Points[0]);

for (int index = 1;
     index < x3Points.length;
     index++) 	{
	filledPolygon.lineTo(x3Points[index],
                             y3Points[index]);

};
filledPolygon.closePath();
g2.setPaint(red);
g2.fill(filledPolygon);
|
Note that this example uses the double-precision implementations of the
geometries classes. Where applicable, float and double-precision implementations
of each of the geometries are provided as inner classes.
Drawing Curves
The Cubic and Quad applets
demonstrate how to create cubic and quadratic curves using CubicCurve2D
and QuadCurve2D respectively. These applets also demonstrate how
the curves are drawn with respect to the positioning of the control points by
allowing you to interactively move both the control points and the end points.
Example: Quad
The Quad applet demonstrates a quadratic
curve, which is a curved segment that has two endpoints and only one control
point. The control point determines the shape of the curve by controlling both
of the endpoint tangent vectors.
Quad.java
contains the complete code for this applet.
First, a new quadratic curve is created with two endpoints
and a control point and the locations of the points are set with respect to
the size of the window.
QuadCurve2D.Double quad = new QuadCurve2D.Double();

Point2D.Double start, end, control;
start = new Point2D.Double();
end = new Point2D.Double();
control = new Point2D.Double();

quad.setCurve(start, control, end);

start.setLocation(w/2-50, h/2);
end.setLocation(w/2+50, h/2);
control.setLocation((int)(start.x)+50, (int)(start.y)-50);
Every time the user moves one of the points, the curve
is reset.
quad.setCurve(start, control, end);
Example: Cubic
The Cubic sample demonstrates a cubic curve,
which is a curved segment that has two endpoints and two control points. Each
control point determines the shape of the curve by controlling one of the endpoint
tangent vectors. In the Cubic sample, colored squares are drawn
where the control points and endpoints are located. The blue control point controls
the tangent vector of the red endpoint and the green control point controls
the tangent vector of the magenta endpoint.
Cubic.java
contains the complete code for this applet.
A new cubic curve is created with two endpoints and a
two control points and the locations of the points are set with respect to the
size of the window.
CubicCurve2D.Double cubic = new CubicCurve2D.Double();

Point2D.Double start, end, one, two;
start = new Point2D.Double();
one = new Point2D.Double();
two = new Point2D.Double();
end = new Point2D.Double();

cubic.setCurve(start, one, two, end);

...

start.setLocation(w/2-50, h/2);
end.setLocation(w/2+50, h/2);
one.setLocation((int)(start.x)+25, (int)(start.y)-25);
two.setLocation((int)(end.x)-25, (int)(end.y)+25);
As in the Quad example, the curve is reset
every time the points are moved.
cubic.setCurve(start, one, two, end);
Drawing Arbitrary Shapes
The ShapesDemo example uses GeneralPath
to make the hourglass-shaped polygons, but you can also use
GeneralPath to make arbitrary shapes with both straight
and curved lines.
Example: Odd_Shape
The Odd_Shape sample uses GeneralPath to create the
arbitrary shape shown in the
Shapes section.
Odd_Shape.java
contains the complete code for this applet.
The following code creates a new GeneralPath and adds the
first point to the path.
GeneralPath oddShape = new GeneralPath();
...

x = w/2 + 50;
y = h/2 - 25;

x2 = x;
y2 = y;

oddShape.moveTo(x, y);
After the first point is added to the path, three straight lines are
added to the path.
x -= 100;
oddShape.lineTo(x, y);
y += 50;
oddShape.lineTo(x, y);
x += 100;
oddShape.lineTo(x, y);
Finally, a cubic curve is added to the path.
x += 10;
y -= 10;
x1 = x - 20;
y1 = y - 20;
oddShape.curveTo(x, y, x1, y1, x2, y2);
Defining Fancy Line Styles and Fill Patterns
You probably noticed that in the previous example some
of the shapes have thicker outlines or are filled with a two-color gradient.
Using the Java 2D Stroke and Paint classes, you can
easily define fancy line styles and fill patterns.
Line Styles
Line styles are defined by the stroke attribute in the Graphics2D
rendering context. To set the stroke attribute, you create a BasicStroke
object and pass it into the Graphics2D setStroke
method.
A BasicStroke object holds information about the line width,
join style, end-cap style, and dash style. This information is used when
a Shape is rendered with the draw method.
The line width is the thickness of the line
measured perpendicular to its trajectory. The line width is specified as
a float value in user coordinate units, which are roughly equivalent
to 1/72 inch when the default transform is used.
The join style is the decoration that is applied
where two line segments meet. BasicStroke supports three join
styles:

JOIN_BEVEL

JOIN_MITER

JOIN_ROUND
The end-cap style is the decoration that is
applied where a line segment ends. BasicStroke supports three
end-cap styles:

CAP_BUTT

CAP_ROUND

CAP_SQUARE
The dash style defines the pattern of opaque
and transparent sections applied along the length of the line. The dash
style is defined by a dash array and a dash phase. The dash
array defines the dash pattern. Alternating elements in the array represent
the dash length and the length of the space between dashes in user coordinate
units. Element 0 represents the first dash, element 1 the first space, and
so on. The dash phase is an offset into the dash
pattern, also specified in user coordinate units. The dash phase indicates
what part of the dash pattern is applied to the beginning of the line.
Fill Patterns
Fill patterns are defined by the paint attribute in the Graphics2D
rendering context. To set the paint attribute, you create an instance of an
object that implements the Paint interface and pass it into the
Graphics2D setPaint method.
Three classes implement the Paint interface: Color,
GradientPaint, and TexturePaint. GradientPaint
and TexturePaint are new in JDK 1.2.
To create a GradientPaint, you specify a beginning
position and color and an ending position and color. The gradient changes
proportionally from one color to the other along the line connecting the
two positions.
The pattern for a TexturePaint is defined by a BufferedImage.
To create a TexturePaint, you specify the image that contains
the pattern and a rectangle that is used to replicate and anchor the pattern.
Example: StrokeAndFill
The StrokeAndFill applet
allows the user to select a graphics primitive, a line style, and a paint
style and to either stroke the object's outline, fill it with the selected
paint, or stroke the object in black and then fill it with the selected paint.
This is a picture of the applet's GUI. To run the applet, click the
picture. The applet will appear in a new browser window.
StrokeAndFill.java contains the complete code for this applet.
The primitives are initialized and entered into an
array of Shape objects. The following code creates a Rectangle
and an Ellipse2D.Double and enters them into the shapes
array.
shapes[0] = new Rectangle(0, 0, 100, 100);
shapes[1] = new Ellipse2D.Double(0.0, 0.0, 100.0, 100.0);
To create a Shape object from a text
string, you must first create a TextLayout object from the
text string.
TextLayout textTl = new TextLayout("Text",
	  new Font("Helvetica", 1, 96),
	  new FontRenderContext(null, false, false));
The following lines transform the TextLayout
so that it is centered on the origin and then enter the Shape
object resulting from the call to getOutline into the shapes
array.
AffineTransform textAt = new AffineTransform();
textAt.translate(0,
    (float)textTl.getBounds().getHeight());
shapes[2] = textTl.getOutline(textAt);
You can choose a primitive by accessing the appropriate
index into the shapes array.
Shape shape =
    shapes[Transform.primitive.getSelectedIndex()];
How rendering is performed depends on which rendering
option is chosen.
- When the user chooses stroke,
Graphics2D.draw is called to perform the rendering. If text
is chosen as the primitive, the glyph outlines are retrieved and then
rendered with the draw method.
- When the user chooses fill,
Graphics2D.fill or Graphics2D.drawString is
called to perform the rendering.
- When the user chooses stroke
and fill,
fill or drawString is called
to fill the Shape, and then draw is called to
stroke its outline.
Note: To both fill and
stroke a graphics primitive, you need to make two separate method calls:
fill or drawString to fill its interior and draw
to stroke its outline.
The three line styles used in this example--thin,
thick, and dashed--are instances of BasicStroke.
// Sets the Stroke.
...
case 0 : g2.setStroke(new BasicStroke(3.0f)); break;
case 1 : g2.setStroke(new BasicStroke(8.0f)); break;
case 2 : float dash[] = {10.0f};
         g2.setStroke(new BasicStroke(3.0f,
             BasicStroke.CAP_BUTT,
             BasicStroke.JOIN_MITER,
             10.0f, dash, 0.0f));
         break;
The dash style in this example has 10 unit dashes
alternating with 10 unit spaces. The beginning of the dash pattern is applied
to the beginning of the line--the dash phase is set to 0.0.
Three paint styles are used in this example--solid,
gradient, and polka. The solid-color paint style is an instance of Color,
the gradient an instance of GradientPaint, and the pattern
an instance of TexturePaint.
// Sets the Paint.
...
case 0 : g2.setPaint(Color.blue); break;
case 1 : g2.setPaint(new GradientPaint(0, 0,
                          Color.lightGray,
                          w-250, h, Color.blue, false));
         break;
case 2 : BufferedImage bi = new BufferedImage(5, 5,
                                BufferedImage.TYPE_INT_RGB);
         Graphics2D big = bi.createGraphics();
         big.setColor(Color.blue);
         big.fillRect(0, 0, 5, 5);
         big.setColor(Color.lightGray);
         big.fillOval(0, 0, 5, 5);
         Rectangle r = new Rectangle(0,0,5,5);
         g2.setPaint(new TexturePaint(bi, r));
         break;
Slide 27 : 27 / 29 : Images
Images
The Java 2D API implements a new imaging model that supports
the manipulation of fixed-resolution images stored in memory. A new Image class
in the java.awt.image package, BufferedImage, can be used to hold and to manipulate
image data retrieved from a file or a URL. For example, a BufferedImage can
be used to implement double buffering--the graphic elements are rendered off-screen
to the BufferedImage and are then copied to the screen through a call to Graphics2D
drawImage. The classes BufferedImage and BufferedImageOp also enable you to
perform a variety of image-filtering operations, such as blur and sharpen. The
producer/consumer imaging model providedin previous versions of the JDK is supported
for backward compatibility.
        bi = new BufferedImage[4];
        String s[] = { "bld.jpg", "bld.jpg", "boat.gif", "boat.gif"};
        for ( int i = 0; i < bi.length; i++ )	{
            Image img = getImage(getURL("images/" + s[i]));
            try	{
                MediaTracker tracker = new MediaTracker(this);
                tracker.addImage(img, 0);
                tracker.waitForID(0);
            }
            catch ( Exception e ) {}
            int iw = img.getWidth(this);
            int ih = img.getHeight(this);
            bi[i] = new BufferedImage(iw, ih, BufferedImage.TYPE_INT_RGB);
            Graphics2D big = bi[i].createGraphics();
            big.drawImage(img,0,0,this);
        }
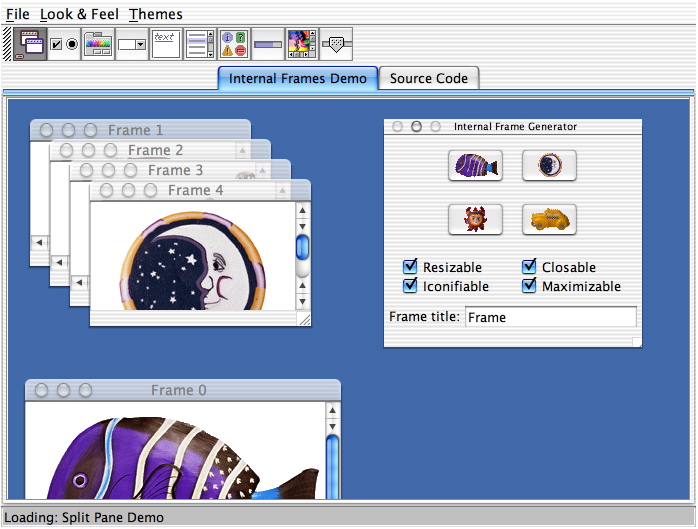
Slide 28 : 28 / 29 : Demonstration SwingSet2
Demonstration SwingSet2
Slide 29 : 29 / 29 : Demonstration Java2
demoSwingSet2.en.htmli